taking and documenting one family (mis)adventure at a time. ticking off dreams from our list bit by bit.
Showing posts with label my take. Show all posts
Sunday, March 17, 2013
My-Take/Recipe: Thai Basil Chicken
When I was still working in the city, there's this on the go Thai resto that we used to frequent. We worked mid-shifts then and would get food delivered from this place. Very filling. And comforting at the same time. That Thai resto unfortunately already closed down some years back.
Just this weekend, in preparation for our we made an inventory of the frozen meats that are still in our freezer and we discovered about half a kilo of uncooked chicken fillet. I initially planned to cook this recipe again for dinner - Joey's (of 80Breakfasts) Mongolian Chicken Recipe. But after watering the plants in our garden and discovering that my basil plant is abundantly growing again, I remembered TIB's Thai Basil Chicken and thought maybe I can try making my own.
I searched the web for an easy recipe and came across this recipe. I had to tweak it a bit since I don't have all of the listed ingredients on hand.
Turned out to be another attempt that is worthy of sharing so I'm posting it here. Enjoy!
Thai Basil Chicken
Prep time: 15 mins
Cooking time: 10-15mins
What You Will Need:
1 lb skinless chicken thighs, cut into half inch strips
2 cloves garlic, finely chopped
1/4 tsp fish sauce (locally called patis)
1 tbsp fine muscovado sugar
1/4 cup vegetable broth or chicken broth (or water if broth is not available)
1/2 tsp light soy sauce
1 big bunch of Thai basil leaves or any local basil, remove stems
1 piece green finger chilies, cut into thin strips
ground white pepper (about one or two pinches)
2 tsps vegetable oil
2 tsps lime juice or calamansi juice
How I did it:
1. Heat oil in a wok or skillet over high heat till nearly smoking hot. Add chopped garlic and immediately stir till golden (you really do not want it smoking because you will burn your garlic).
2. Add chicken strips. Stir constantly until chicken changes color (probably will take you about 3-5 minutes).
3. Add chilies, broth, seasonings (fish sauce, muscovado sugar, soy sauce). Adjust according to taste. Continue stir frying until all the meat is coated.
4. Drop the basil and stir fry again just until leaves are wilted but still retaining its color.
5. Stir in calamansi or lime juice and season with pepper.
6. Serve on top of a steaming cup of brown rice.
This can feed 3 hungry stomachs. (or 5 if NOT that hungry hehe)
Labels:
asian,
chicken,
healthy recipes,
homecooking,
my take,
recipe,
thai
Thursday, April 12, 2012
My-Take/Recipe: Mama Aida's Sipo Egg
Eggs are one of our VIP (very-important-pantry) must-haves . We just cannot afford to go out of stock because this is the only food that Maia never says no to. When everything fails, to the eggs we go.
I've long wanted to share the recipe for this dish but I just couldn't figure out how SIPO is spelled. Thanks to Google and for this recipe's popularity in Kapampangan feasts, I got several hits and found several other variations to this recipe that I do plan to try in the future (well, mainly because they had more veggies in them so I wanted to try and introduce that to Maia as well).
For this particular recipe, you will need:
1 pack (about 250g) of mixed frozen peas and carrots (yes fresh is even better)
about 100g of chicken gizzard, cleaned and cut into small, bite size pieces
1 piece of med sized onion, chopped
1 clove of garlic, minced
1 pack or can of cream of mushroom soup
about 2-3 tsps of butter (no need to melt)
about 2 tsps of olive oil (mixed to a tsp of butter)
24 pcs of boiled quail eggs, peeled
How I did it:
1. Saute onion and garlic in butter+oil mixture.
2. Add the chicken gizzard and over low fire cook till done (I like to cook ours really well and by well, I mean browned)
3. Add in the frozen veggies (make sure they're already thawed).
4. Pour in the mushroom soup. (Dilute the cream of mushroom soup in about 4 cups of water if you're using the powdered kind but when you have the canned (condensed) version, just pour directly.)
5. Simmer for 10-15 minutes.
6. Add in the peeled quail eggs and serve hot.
This can feed about 4-6 hungry stomachs. Enjoy!
Aside from the common chicken eggs, Quail eggs have also become a recent favorite of our little growing kid. She discovered how delish that teeny tiny egg was when she first tasted her Lola Aida's (my mother in law) Sipo Egg dish. My mother in law is Kapampangan so yes, her cooking skills are just way, way beyond my reach. But once in a while, I try my best to replicate her cooking to appease (mostly Tibs) our household's longing for her dishes.
I've long wanted to share the recipe for this dish but I just couldn't figure out how SIPO is spelled. Thanks to Google and for this recipe's popularity in Kapampangan feasts, I got several hits and found several other variations to this recipe that I do plan to try in the future (well, mainly because they had more veggies in them so I wanted to try and introduce that to Maia as well).
For this particular recipe, you will need:
1 pack (about 250g) of mixed frozen peas and carrots (yes fresh is even better)
about 100g of chicken gizzard, cleaned and cut into small, bite size pieces
1 piece of med sized onion, chopped
1 clove of garlic, minced
1 pack or can of cream of mushroom soup
about 2-3 tsps of butter (no need to melt)
about 2 tsps of olive oil (mixed to a tsp of butter)
24 pcs of boiled quail eggs, peeled
How I did it:
1. Saute onion and garlic in butter+oil mixture.
2. Add the chicken gizzard and over low fire cook till done (I like to cook ours really well and by well, I mean browned)
3. Add in the frozen veggies (make sure they're already thawed).
4. Pour in the mushroom soup. (Dilute the cream of mushroom soup in about 4 cups of water if you're using the powdered kind but when you have the canned (condensed) version, just pour directly.)
5. Simmer for 10-15 minutes.
6. Add in the peeled quail eggs and serve hot.
This can feed about 4-6 hungry stomachs. Enjoy!
Friday, December 30, 2011
Recipe/My-Take: Cheesy Garlic Dip
At a recent salo-salo at the office, a colleague prepared this really good taco cheese sauce. It was a hit that everyone asked for her recipe. Last Christmas I tried making my version. I just tweaked her recipe to incorporate the things we like (re: herbs + lots of garlic).
My version made use of:
How I did it:
1. Heat milk in low fire.
2. Add in the garlic and cheese.
3. Whisk till cheese has fully melted.
4. Add in the herbs and black pepper (if needed).
5. Enjoy!!!!
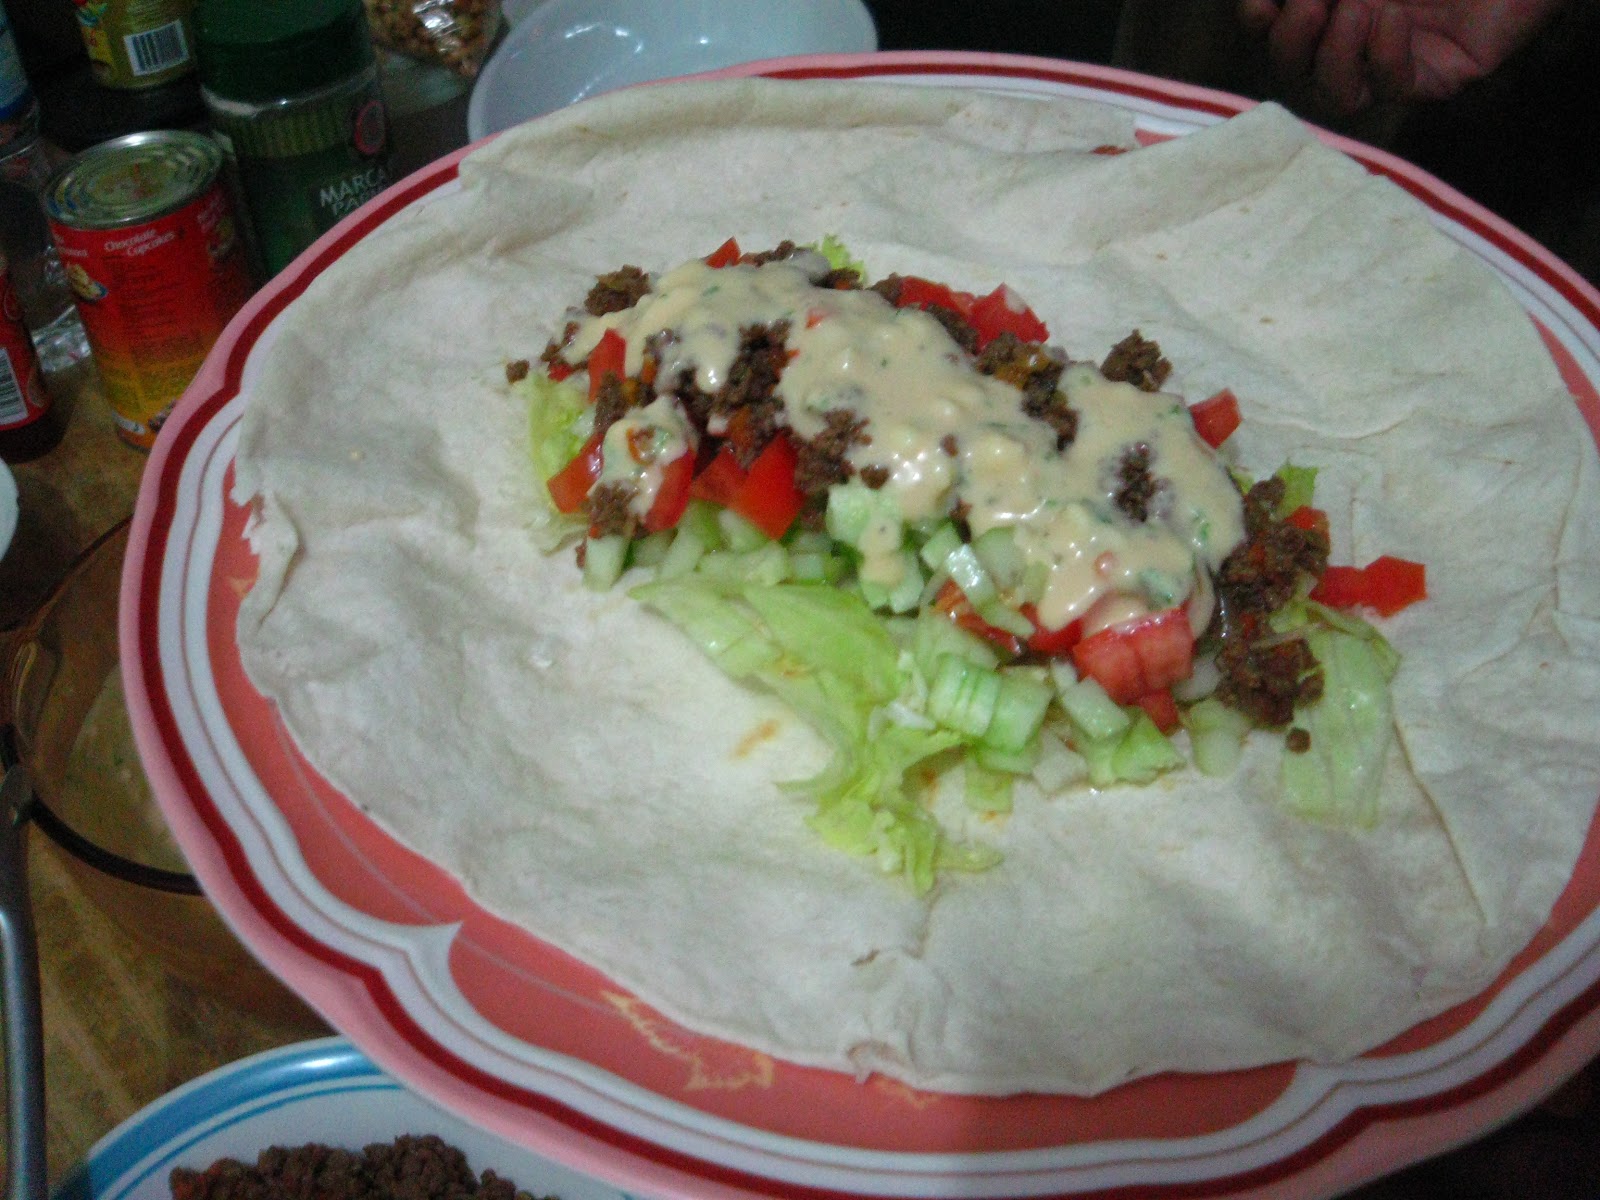
This recipe yielded about a cup and a half of cheese dip/sauce. My little girl enjoyed it so much she won't eat her taco if it's not overflowing with cheese. Here's a photo of the soft taco we assembled last Christmas. We just used the ready mixed seasoning from McCormick when we cooked the beef and chopped a variety of veggies that we like - tomatoes, cucumber, iceberg lettuce, bell peppers.
| Just the right consistency. Not too runny. Not too thick |
- 1 cup of filled evaporated milk (I used Angel for this one)
- about a cup of cubed cheese (I used Cheezee)
- about 4 cloves of garlic, minced
- chopped parsley
- fresh tarragon
- freshly cracked pepper (we only have black but white would be better)
How I did it:
1. Heat milk in low fire.
2. Add in the garlic and cheese.
3. Whisk till cheese has fully melted.
4. Add in the herbs and black pepper (if needed).
5. Enjoy!!!!
This recipe yielded about a cup and a half of cheese dip/sauce. My little girl enjoyed it so much she won't eat her taco if it's not overflowing with cheese. Here's a photo of the soft taco we assembled last Christmas. We just used the ready mixed seasoning from McCormick when we cooked the beef and chopped a variety of veggies that we like - tomatoes, cucumber, iceberg lettuce, bell peppers.
| store bought tortilla bursting at the seams when rolled |
| i sneaked in some carrots when we cooked the beef filling. sneaky mommy! hehe |
Monday, August 22, 2011
Recipe/My Take: Yellow Cab's Charlie Chan Chicken Pasta
I have always been a big fan of Yellow Cab's Charlie Chan Chicken Pasta. One weekend I was terribly craving for it but being a bonafide denizen of the hills of Cavite we will need to travel the least an hour before we get to the nearest Yellow Cab outlet. So each time a battle between Laziness and Food ensues, it is always laziness that wins by default.
Living in the hills has its share of advantage and disadvantages. But I'd like to believe that apart from the traffic congestion and the occasional feeling of deprivation especially when terrible cravings hit me, we are still at big advantage. We have fresh air, the feel of Christmas air during the Yuletide season with us waking up to foggy window glass on most days, and wide play spaces for Maia. Also, one big advantage is me learning to make homemade versions of my favorite dishes.
So enough with the blabbering, I present to you my version of Yellow Cab's Charlie Chan Chicken Pasta. As my fans would say, nothing beats the home cooked version! :)
What I used to cook this recipe:
300g cooked spaghetti (al dente)
150g boneless chicken breast (cut into strips) or you can used chicken fingers too (less hassle)
1 tsp sesame oil
Olive oil for sauteing
1 pc med sized onion, finely chopped (I used white for this one)
garlic cloves, minced (I used about 5 since our household loves garlic)
Lee Kum Kee Char Siu Sauce (I used a small pack)
Lee Kum Kee Chili-Garlic Sauce (I used half of the pack/sachet)
9 tbsps Oyster Sauce (I used 4 tbsps to marinate the chicken)
3 tsp muscovado sugar
1/4 c water from the cooked pasta
salt and pepper to taste
toasted peanuts (preferably unsalted)
spring onions for garnish
chili flakes (optional)
What I did:
1. Marinate the chicken breast using 4 tbsps of oyster sauce for about 20 mins.
2. Saute onion and garlic till translucent in olive oil.
3. Add chicken and stir fry till browned. Season with salt and pepper.
4. Mix the remaining oyster sauce with charsiu, chili garlic sauce, sesame oil, muscovado sugar, and water well.
5. Pour over stir-fried chicken, stir and simmer.
6. Toss over cooked pasta and garnish with toasted peanuts and chopped spring onions. You can also add chili flakes for that extra kick if you like it spicy.
There you go. Enjoy! This recipe can feed for 4 hungry stomachs.
Living in the hills has its share of advantage and disadvantages. But I'd like to believe that apart from the traffic congestion and the occasional feeling of deprivation especially when terrible cravings hit me, we are still at big advantage. We have fresh air, the feel of Christmas air during the Yuletide season with us waking up to foggy window glass on most days, and wide play spaces for Maia. Also, one big advantage is me learning to make homemade versions of my favorite dishes.
So enough with the blabbering, I present to you my version of Yellow Cab's Charlie Chan Chicken Pasta. As my fans would say, nothing beats the home cooked version! :)
What I used to cook this recipe:
300g cooked spaghetti (al dente)
150g boneless chicken breast (cut into strips) or you can used chicken fingers too (less hassle)
1 tsp sesame oil
Olive oil for sauteing
1 pc med sized onion, finely chopped (I used white for this one)
garlic cloves, minced (I used about 5 since our household loves garlic)
Lee Kum Kee Char Siu Sauce (I used a small pack)
Lee Kum Kee Chili-Garlic Sauce (I used half of the pack/sachet)
9 tbsps Oyster Sauce (I used 4 tbsps to marinate the chicken)
3 tsp muscovado sugar
1/4 c water from the cooked pasta
salt and pepper to taste
toasted peanuts (preferably unsalted)
spring onions for garnish
chili flakes (optional)
What I did:
1. Marinate the chicken breast using 4 tbsps of oyster sauce for about 20 mins.
2. Saute onion and garlic till translucent in olive oil.
3. Add chicken and stir fry till browned. Season with salt and pepper.
4. Mix the remaining oyster sauce with charsiu, chili garlic sauce, sesame oil, muscovado sugar, and water well.
5. Pour over stir-fried chicken, stir and simmer.
6. Toss over cooked pasta and garnish with toasted peanuts and chopped spring onions. You can also add chili flakes for that extra kick if you like it spicy.
There you go. Enjoy! This recipe can feed for 4 hungry stomachs.
Subscribe to:
Posts (Atom)