Protected by Copyscape Plagiarism Checker
Showing posts with label recipe. Show all posts

Tuesday, August 6, 2013

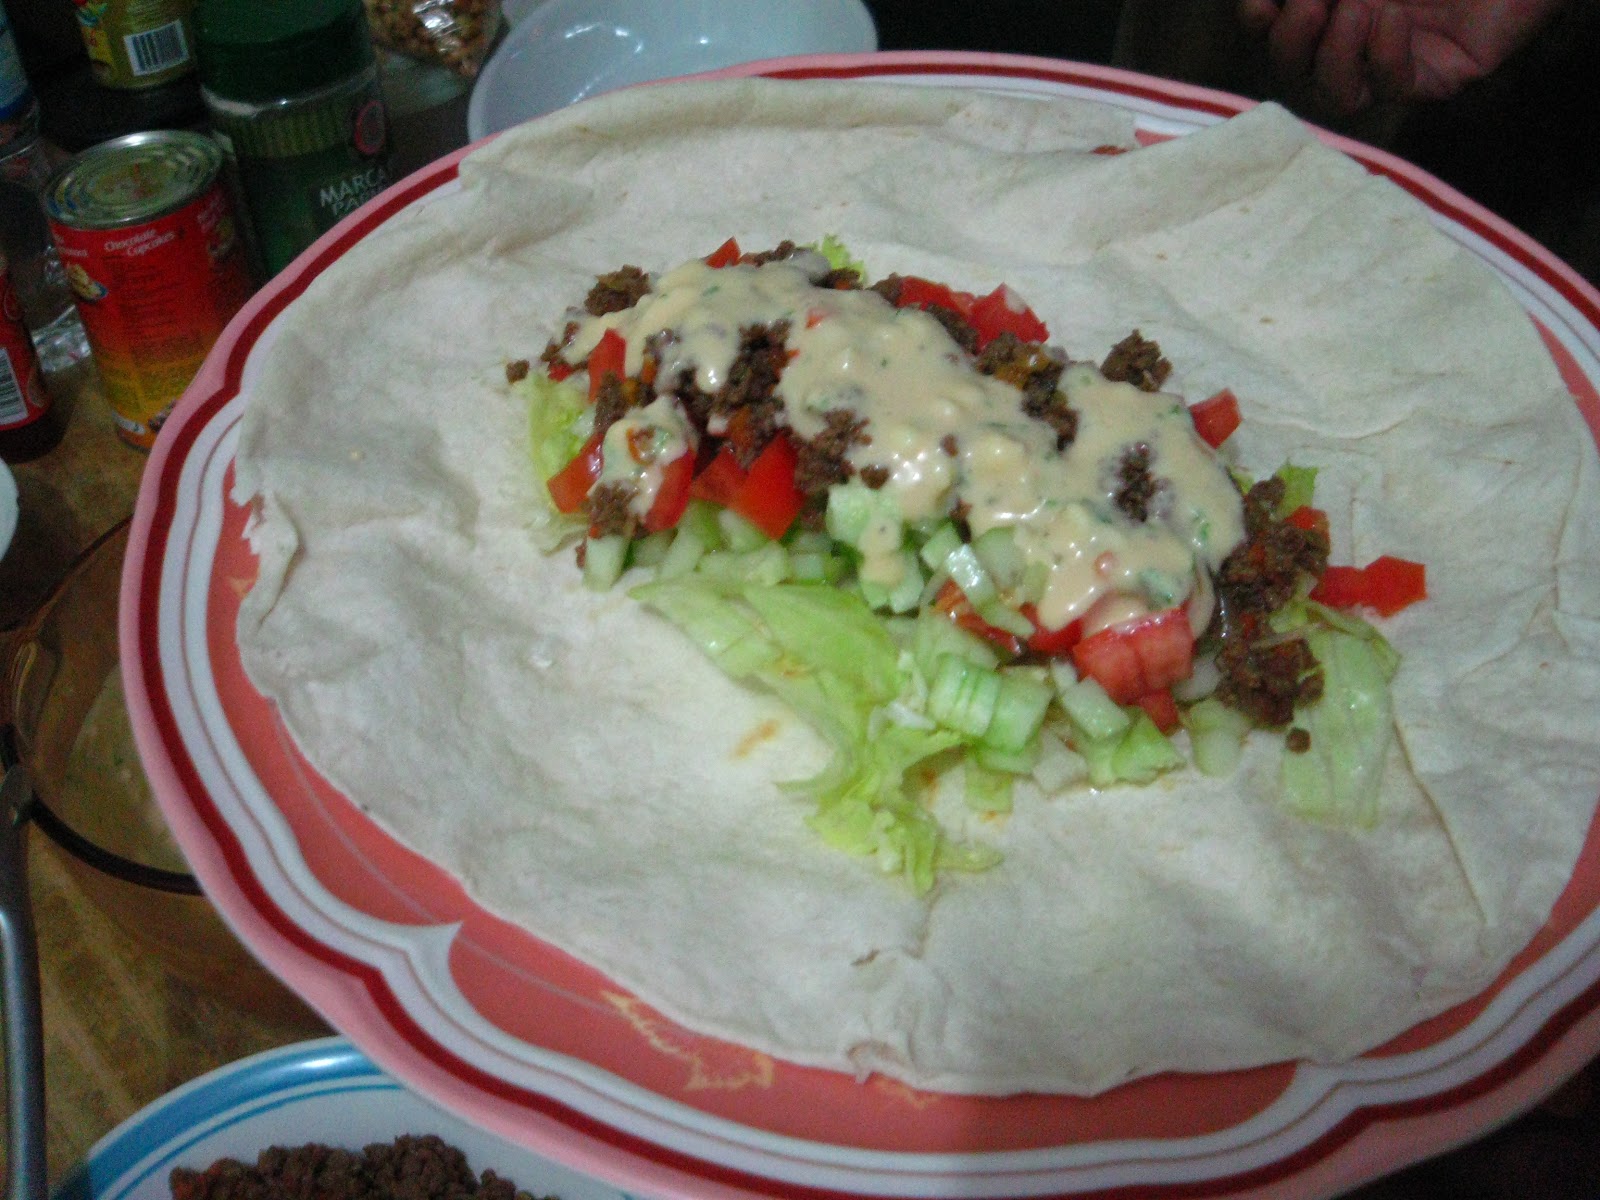
Recipe: Breakfast Burrito

photo posted in Instagram
A few weeks ago, my college bff who is now based in the US was here from a month long vacation. We got together over dinner with our respective families and other college buddies. We started reminiscing about my brief stay with her when I visited the US in 2007.

The day after our dinner meet up, I remembered the first meal I had in CA was a fat tasty burrito. I took an early flight out of Phoenix then to spend a weekend with her in Orange County. She picked me up from the airport and we drove through a burrito place. That memory had me craving for burritos. Luckily, I saved a packed of tortilla bread in our freezer. I quickly searched the web for a simple breakfast burrito recipe and realized that well, I can easily make my own recipe up...with whatever is available in our fridge.

So I thawed the tortilla out. Heated the pan. And started chopping. I didn't think my family would like it, but they surprisingly did. It was a hit, especially to my little girl.

Shared a photo in instagram and a few friends asked for a recipe. So here goes, my very easy quick breakfast burrito recipe.

Cooking time: really quick, like 5 mins
Prep time: depends on how fast you chop and how many you would be chopping but roughly 10mins in my case

What you will need:

- tortilla bread, I used herbed tomato tortilla from French Baker
- shredded lettuce, I used iceberg for this one
- plum tomatoes, chopped
- white onion, chopped
- bell peppers (red, green, yellow, whatever you have), chopped
- grated cheese
- scrambled eggs
- Japanese mayo
- optional -- diced leftover chicken, longganisa, tocino

tortilla


How to assemble:

- reheat your tortilla bread, takes about 1-2 mins per side or when the bread is already soft enough to roll
- squeeze about a teaspoon of japanese mayo and spread thinly unto one side of the tortilla.
- dump in the veggies. I took a spoonful of each since the tortilla is small (just about 6 inches in diameter)
- top with scrambled eggs and grated cheese
- roll firmly to form a log.
- enjoy!!!


Tuesday, June 4, 2013

Recipe: Egg Sandwich Spread


What's your go-to recipe when you need to instantly whip out a meal for your family?

Mine will always be my super fast and super easy Sardines Pasta. But some days, especially on weekends where we eat breakfast late (usually around brunch already) and decide to skip lunch, sandwiches are my easy go to snacks. Even if I like (or rather love) to keep stock of different kinds of spreads in our pantry, I always try to inject a little bit of homemade touch on the meals that I serve to my family during weekends (even of lazy ones).

This recipe is one of the most loved homemade spread in our household. It's very easy to make. And my 4 year old always love to help make this. On a recent playdate, we made a tub of this for our little potluck picnic. Our small sandwich container was wiped out clean so I am taking that as a compliment. We have a winning spread here. :)

Anyways, since it's school season, I'm thinking maybe you'd wanna try making this for your kids baon.

What you will need:

5 pieces large eggs, hardboiled and chopped finely
1 small red onion, finely chopped
1 sprig of parsley, finely chopped
2 packs of light mayo
1/2 tsp mustard
1/2 tsp condensed milk
salt and pepper to taste

How to do it.

1. Dump all ingredients unto a deep bowl and mix well.
2. Toast your favorite flat bread and spread away.

In the photo, I'm using a multigrain loaf bread. I think it's a good match to this spread.

This recipe by the way, yields about a pint of egg sandwich spread. It usually keeps for about a week in our fridge.But I guess, since the ingredients are very attractive to Salmonella, best to consume it within 3 days.

Sunday, March 17, 2013

My-Take/Recipe: Thai Basil Chicken


When I was still working in the city, there's this on the go Thai resto that we used to frequent. We worked mid-shifts then and would get food delivered from this place. Very filling. And comforting at the same time. That Thai resto unfortunately already closed down some years back.

Just this weekend, in preparation for our we made an inventory of the frozen meats that are still in our freezer and we discovered about half a kilo of uncooked chicken fillet. I initially planned to cook this recipe again for dinner - Joey's (of 80Breakfasts) Mongolian Chicken Recipe. But after watering the plants in our garden and discovering that my basil plant is abundantly growing again, I remembered TIB's Thai Basil Chicken and thought maybe I can try making my own.

I searched the web for an easy recipe and came across this recipe. I had to tweak it a bit since I don't have all of the listed ingredients on hand.

Turned out to be another attempt that is worthy of sharing so I'm posting it here. Enjoy!


Thai Basil Chicken 
Prep time: 15 mins
Cooking time: 10-15mins

What You Will Need:

1 lb skinless chicken thighs, cut into half inch strips
2 cloves garlic, finely chopped
1/4 tsp fish sauce (locally called patis)
1 tbsp fine muscovado sugar
1/4 cup vegetable broth or chicken broth (or water if broth is not available)
1/2 tsp light soy sauce
1 big bunch of Thai basil leaves or any local basil, remove stems
1 piece green finger chilies, cut into thin strips
ground white pepper (about one or two pinches)
2 tsps vegetable oil
2 tsps lime juice or calamansi juice

How I did it:

1. Heat oil in a wok or skillet over high heat till nearly smoking hot. Add chopped garlic and immediately stir  till golden (you really do not want it smoking because you will burn your garlic).
2. Add chicken strips. Stir constantly until chicken changes color (probably will take you about 3-5 minutes).
3. Add chilies, broth, seasonings (fish sauce, muscovado sugar, soy sauce). Adjust according to taste. Continue stir frying until all the meat is coated.
4. Drop the basil and stir fry again just until leaves are wilted but still retaining its color.
5. Stir in calamansi or lime juice and season with pepper.
6. Serve on top of a steaming cup of brown rice.


This can feed 3 hungry stomachs. (or 5 if NOT that hungry hehe)


Monday, February 18, 2013

Recipe: Stuffed Cabbage Rolls

While I was preparing this recipe, I was immediately transported to some 6 or 7 years ago when I was still renting a house with college friends. We would take turns preparing our weekly dinner menu and cooking  it. This dish is one of our favorites from one of my housemate's menu. It was a very comforting saucy dish so fitting to serve during a cold, rainy night at home. Even the husband had fond memories of this dish (we were already together then) as well.


Unfortunately, my version didn't taste anywhere near my housemate's version (hello Girl! Ngayo ko recipe mo, please!) and it disappointed my husband a bit. His verdict: stuffing was bland (because I deliberately put just a mere pinch of salt in it. I thought the hint of paprika will save me because he likes spicy things but no, it didn't).

My husband is my #1 culinary fan. So his disappointment is my disappointment. But the good thing about cooking is you can just keep on trying till you get the perfect recipe. And as this is a very flexible recipe (you can play with the stuffing - if you want it healthier you can use tofu or ground chicken breast), I am sure my household will not get tired of this even if I include it in our weekly menu.


But moving on to the recipe:

What I used:

1 head of large cabbage, each leaf taken off the stalk

Stuffing:
about 200g of lean ground pork
1 small carrot, diced
1 med onion, chopped finely
chopped spring onions
A sprig of flat parsley, chopped
pepper
paprika
salt
olive oil for sauteeing

Sauce:
about a cup of Marinara Sauce, click here for recipe***

***(this can be substituted by 1 piece of tomato chopped and sauteed over garlic and 1/2 cup of tomato sauce, dilute with 1/4 cup water)

How I did it:

1. Gently scrape off the hard part on each cabbage leaf.
2. Steam each of the leaf for about 1-2 mins (just so they can be easily rolled) and set aside.
3. Mix the carrots, onions, parsley, a pinch of pepper, paprika and salt with the ground meat.
4. Heat oil and dump in the meat mixture and saute till slight browned. Set aside to cool for about 10-15 minutes.
5. When the meat has cooled off, scoop about 1 tablespoon of it on each leaf and wrap (just like how you'd wrap spring rolls). Secure the center with a toothpick to prevent the leaf from breaking when you dump it unto the sauce.
6. Reheat the marinara sauce and gently place each of the cabbage rolls unto the sauce. Simmer for about 5-10 minutes depending on how you'd like your leaf to cook. You can also opt to steam the leaves instead and pour the reheated sauce unto it before serving. Whatever works best for you.
7. Serve with hot steaming rice and you're good to go!

This recipe was able to feed 6 hungry stomachs. The roll alone is very filling already so I ate mine with just a few spoonfuls of rice (I think maybe 3). The hubby and the little miss loved it with a lot of sauce so I had to reheat more. I think it would have been better if I added a few spoonfuls of tomato paste unto the meat when I sauteed it. I will try that next time. Even if my household complained of how bland the roll turned out to be, they were still able to clean their respective plates up. Still a happy ending for me, come to think of it.

Thursday, January 3, 2013

Recipe: Leftover Chicken and Steamed Vegetables Soup

Prep time: 5 minutes
Cooking time: 15 minutes


It has been quite sometime since my last recipe post here. Admittedly, I did lose my cooking mojo (and honestly I still have not gained it back till now). I would attempt to cook but they never turned out as good as I'd expected them to be so every time my family would request for home-cooked meals from me, I would often just choose safer menus that wouldn't take longer than 30 minutes to cook. There's one meat recipe that I made several times though which my family really loved but that was a recipe I borrowed from Maqui

The past few days however saw us with plenty of leftovers from New Year's and as I have a penchant for 'upcycling' things I was looking into finding a recipe that I could use most of the remaining leftovers in our fridge. Gladly, while I was thumbing into an old issue of Good Housekeeping magazine I found a soup recipe. It will provide me a use for the steamed veggies and the lechon manok leftovers that we have. Even better, I had all the ingredients for it and I was really aiming to use them soon else I wouldn't really wish for them to stay in our fridge for another week.

So here goes my soup recipe that ended up tasting more like Chicken-ala-King. Fortunately, it still won the hearts of my 'critics'. 

What I used:

-A handful of Leftover Lechon Manok, diced (I used the breast part here since that's usually what's leftover)
-2 cups of steamed veggies (large chunks of broccoli, cauliflower, carrots and baguio beans), diced
-1/2 cup of evaporated filled milk
-1/2 cup of whole corn kernels
-A few teaspoons of flour
-1 tsp of cornstarch
-2 cups chicken broth/vegetable broth
-1 medium onion, chopped 
-1 knob butter
-2 tsps olive oil
-salt and pepper to taste
-(optional) chopped parsley for garnish

How I did it:


1. Over low fire, saute the onion over melted butter and olive oil till translucent/fragrant.
2. Add in the leftover chicken and saute for 3 more minutes.
3. Dump in the steamed veggies and corn kernels
4. Sprinkle the flour and stir in the broth. 
5. Pour in the milk and simmer. If the soup isn't thick enough to your liking, dilute your cornstarch in a few teaspoons of water, pour over the simmering soup and mix evenly till you achieve your desired consistency.
6. Remove from fire and garnish with chopped parsley or spring onions, whichever you have on hand.
7. Serve with a hot steaming bowl of rice. Enjoy!


This can feed 4-6 hungry stomachs. 

Monday, August 20, 2012

Recipe: Shrimp and Ruote Pasta In Pesto-Marinara Sauce


Prep time: 20mins
Cooking time: 20 mins

Pasta is popular in our household. Partly because, I can cook them effortlessly and fast given a few ingredients. This is usually my go-to recipe on lazy weekends or days when the fridge goes empty and none of us are willing to do the groceries. So I usually just stock up on different types of pasta and lots of tomatoes for days like that. Even our little girl is used to eating all types of pastas and sauces. On good days, she would even volunteer to help me cook. 

What I used for this recipe:

about 400g of ruote pasta, cooked al-dente per package instructions 
1/4 cup pasta water
3 pcs large plum tomatoes, blanched, peeled and diced (for the marinara sauce)
1 med red onion, chopped
4 cloves garlic, crushed and chopped finely
1 pack Clara Ole Three-cheese spaghetti sauce
4 tbsps tomato paste
100g fresh shrimps, peeled, deveined and quartered
1 knob butter
olive oil
salt and pepper
fresh herbs (i used italian oregano and basil), chopped finely
chopped parsley and grated cheese for garnish

How I did it:

1. Saute onion, garlic in olive oil and butter till fragrant. 
2. add in tomatoes and pasta water and simmer for about 10 minutes or until the mix has a thick, soupy consistency.
3. pour in the spaghetti sauce, tomato paste and fresh herbs. Whisk till tomato paste is evenly incorporated unto the sauce.
4. add in the shrimp, stir until they change color.
5. toss in the cooked pasta. garnish generously with grated cheese and chopped parsley.
6. enjoy!!!!

This recipe can feed about 4-5 hungry stomachs. (and still save enough for meryenda)

Saturday, May 19, 2012

Recipe: Chicken and Corn Chowder

Prep time: 10 mins
Cooking time: 15 mins

I'm a sabaw lover. The literal hot sabaw, I mean. And I especially love a hot sabaw on rainy days. But today, despite the almost unbearable heat, I decided to make some chowder for lunch since the little girl's been asking for soup and I had promised to make some for breakfast earlier. My recipe turned out to be a little watery but my family still relished it down to the last drop. They probably missed my cooking so much that even a fried egg cooked by me would have tasted like m and m's to them (my analogy was a little off but m and m's came to mind when I thought about melt in the mouth. and please allow me to exaggerate because they were really very vocal about wanting me to cook for them again).

So anyway, it has gotten colder since rain started pouring a few minutes ago. I hope it stays that way through the entire night. I'm off to put the little girl to sleep in a few but before I log off for the night, let me just share with you the recipe for this award-winning soup per my husband (yes, he is my biggest fan next to Maia). 


What I used:

200 grams flaked, pre-boiled chicken meat
1 cup potatoes, diced
1 cup cream style corn
1 small white onion, chopped finely
1 knob butter + approx 2-3 tsps flour to make the roux
2 cups chicken broth (saved from the boiled chicken)
1/4 cup evaporated filled milk
olive oil
chopped spring onions/parsley for garnish
salt and pepper to taste

How I did it:

1. On a separate pan, saute white onion on olive oil and add in the diced potatoes and the flaked chicken.
2. On another pan and over low fire, melt butter and add in flour. Stir till they're combined thoroughly. 
3. Add in the broth and the sauteed chicken flakes.
4. Stir and add the cream style corn. Simmer for 5 minutes.
5. Add milk, stir and simmer for another 5 minutes or till desired soup consistency is achieved.
6. Serve hot with pan de sal (or in a soup bowl). Enjoy!!!

This recipe serves about 3-4 hungry stomachs.

Thursday, May 10, 2012

Recipe: Sauteed Shrimp with Chicharo and Cauliflower Florets

Prep time: 10 mins
Cooking time: 10-15 mins

My little girl loves cauliflower and broccoli so I always try to come up with simple, easy yet tasty recipes for her. I've had this particular recipe in mind for some time now but every time I buy the ingredients, the hubby would suddenly request for chopsuey or pansit and I'd end up using my primary ingredients for a different recipe. So today, finally, while the my ingredients are still fresh I woke up early and cooked this for Maia's lunch (and my baon as well).


What you will need:

  • 150g fresh shrimps (suaje), peeled and deveined (we left a few pieces with the skins on though because the little girl enjoys peeling them herself)
  • 2 cup cauliflower florets
  • 1 cup chicharo (snow peas)
  • 3 tsps oyster sauce
  • 2 tsps cornstarch diluted in 1/2 cup of water
  • 1 medium sized onion, chopped
  • 1 clove garlic, minced
  • olive oil
  • salt and pepper to taste
  • optional - hard boiled quail eggs
How I did it:

1. Saute onion and garlic till fragrant.
2. Add in the cauliflower florets and saute for 2 minutes.
3. Add in the chicharo. Toss for another 2 mins or till chicharo is slightly crisp.
4. Add in the shrimps and toss till slightly pinkish.
5. Add in the oyster sauce. Toss again till veggies and shrimps are coated
6. Add in the cornstarch slurry and wait till sauce thickens.
7. Season with salt and pepper to taste. Serve with hot, steamed rice.

p.s. I added about 20 pcs of hard boiled quail eggs to this recipe because the little girl also loves those. But these are really just optional.


ENJOY!!!

This recipe can feed 3-4 hungry stomachs.

Thursday, April 12, 2012

My-Take/Recipe: Mama Aida's Sipo Egg

Eggs are one of our VIP (very-important-pantry) must-haves . We just cannot afford to go out of stock because this is the only food that Maia never says no to. When everything fails, to the eggs we go.

Aside from the common chicken eggs, Quail eggs have also become a recent favorite of our little growing kid. She discovered how delish that teeny tiny egg was when she first tasted her Lola Aida's (my mother in law) Sipo Egg dish. My mother in law is Kapampangan so yes, her cooking skills are just way, way beyond my reach. But once in a while, I try my best to replicate her cooking to appease (mostly Tibs) our household's longing for her dishes.

I've long wanted to share the recipe for this dish but I just couldn't figure out how SIPO is spelled. Thanks to Google and for this recipe's popularity in Kapampangan feasts, I got several hits and found several other variations to this recipe that I do plan to try in the future (well, mainly because they had more veggies in them so I wanted to try and introduce that to Maia as well).


For this particular recipe, you will need:

1 pack (about 250g) of mixed frozen peas and carrots (yes fresh is even better)
about 100g of chicken gizzard, cleaned and cut into small, bite size pieces
1 piece of med sized onion, chopped
1 clove of garlic, minced
1 pack or can of cream of mushroom soup
about 2-3 tsps of butter (no need to melt)
about 2 tsps of olive oil (mixed to a tsp of butter)
24 pcs of boiled quail eggs, peeled

How I did it:

1. Saute onion and garlic in butter+oil mixture.
2. Add the chicken gizzard and over low fire cook till done (I like to cook ours really well and by well, I mean browned)
3. Add in the frozen veggies (make sure they're already thawed).
4. Pour in the mushroom soup. (Dilute the cream of mushroom soup in about 4 cups of water if you're using the powdered kind but when you have the canned (condensed) version, just pour directly.)
5. Simmer for 10-15 minutes.
6. Add in the peeled quail eggs and serve hot.

This can feed about 4-6 hungry stomachs. Enjoy!

I added in some broccoli stems here since I had some left from the day before. The eggs were peeled by the little girl and she happily devoured the vegetables and eggs right after I served it.
I couldn't be any happier.

Thursday, March 22, 2012

Recipe: How To Make Buco Salad Ice Candy


What you need:

1 cup of cooked sago (I used small pearls)
1 cup of evaporated filled milk
1/2 cup of condensed milk
1 1/2 cup of shredded fresh (and young) buco (coconut) meat
1 cup water
1/2 cup buco water
20-25 pcs of 1.5 x 10 plastic ice candy wrappers

How to do it:

1. Mix the evap and condensed milk together. I do this first to make sure the sweetness of the condensed milk is evenly distributed.
2. Add the milk mixture unto the buco water and the plain water.
3. Stir till milk is thoroughly incorporated with the water (I used a whisk to do this)
4. Add the the sago and the shredded coconut.


5. Funnel unto the plastic wrappers, knot and freeze.


Yields about 20-25 pcs of 5 inch ice candy sticks. Ours is still freezing so I have yet to tell you how it taste but my little girl drank about 1 cup of the mixture this morning and she loved it already so I think once frozen it should taste way better. I wanted to use pure buco water for this recipe but I needed the buco water that I had for a different project so I had to substitute with plain distilled water. You might want to try that on your version though (just a suggestion).


This summer has not been as hot as I'd expected it to be but still ice candies are always the perfect accompaniment to afternoon meryendas - so hot or not - enjoy! :))

Tuesday, March 13, 2012

Recipe: Kalabasa and Spinach Soup

My aunt shared this recipe to me a few weeks ago and I was dying to try it but couldn't find cheap spinach then so when the prices went down last week I immediately grabbed a pack and set out to make my version of this soup.

Sad to say, the little girl didn't like it very well. I will have to figure out how to make it interesting but it was a hit among the adults. Maybe I can add cream or milk next time to add in some richness to the flavor.

Here's what I needed to make this soup:

1 piece (about 50g) breast fillet, chopped
1 cup chicken broth
2 cups kalabasa (squash)
1 cup spinach leaves
2 cloves garlic, minced
1 small white onion, chopped
1 tsp olive oil
salt and pepper to taste

How I did it:

1. Saute garlic and onion.
2. Add chicken breast and saute until it changes color.
3. Add in the chicken broth. Bring to a boil.
4. Add the kalabasa (squash) cubes and simmer till tender. 5. Turn off the heat and add the spinach leaves.
6. Season with salt and pepper to taste then set aside to cool while uncovered.
7. When soup has cooled down, pour unto blender and blend till desired texture is achieved. I wanted mine with still some bits of kalabasa on it.
8. Reheat once you're ready to serve.
9. Enjoy!

This is good for 3-4 servings. Best served during a cold, rainy day.

I wonder if what herb/spice I should add to perk up the taste of this soup. Any suggestions?

Monday, January 16, 2012

Recipe: Freezer Leftovers Pasta with Quezo De Bola


Yes, I made this pasta out of all the leftovers we had from the holidays. Two weeks past and we still have some stuff in the freezer. Good thing when we got home last Sunday, I was really starving so I was able to come up with a tasty pasta dish out of all the leftovers that I was close to throwing away.

What I used for this recipe:

about 400g of cooked spaghetti
3 pcs med tomatoes, diced
1 med red onion, chopped
4 cloves garlic, crushed and chopped finely
about 150g of frozen, cooked tahong (mussels)
4 slabs honeycured bacon, chopped and cooked (to render fat)
2 pcs spanish sardines (a leftover from our pantry, technically not from the freezer), deboned and mashed
grated quezo de bola
a handful of fresh basil (torn into small pieces)
1/4 cup olive oil

How I did it:

1. Saute onion, garlic and tomatoes (till the skin peels off from the tomato and the onion translucent. make sure you don't burn nor brown the garlic) in olive oil (using half of the olive oil)
2. add in the mussels, bacon and sardines.
3. pour the remaining olive oil, add fresh basil and toss over cooked pasta until it is fully coated.
4. garnish with grated quezo de bola.
5. enjoy!!!!

This recipe can feed about 5-6 hungry stomachs.

Closer look. :-)

Friday, December 30, 2011

Recipe/My-Take: Cheesy Garlic Dip

At a recent salo-salo at the office, a colleague prepared this really good taco cheese sauce. It was a hit that everyone asked for her recipe. Last Christmas I tried making my version. I just tweaked her recipe to incorporate the things we like (re: herbs + lots of garlic).

Just the right consistency. Not too runny. Not too thick
My version made use of:

  • 1 cup of filled evaporated milk (I used Angel for this one)
  • about a cup of cubed cheese (I used Cheezee)
  • about 4 cloves of garlic, minced
  • chopped parsley
  • fresh tarragon
  • freshly cracked pepper (we only have black but white would be better)

How I did it:

1. Heat milk in low fire.
2. Add in the garlic and cheese.
3. Whisk till cheese has fully melted.
4. Add in the herbs and black pepper (if needed).
5. Enjoy!!!!

This recipe yielded about a cup and a half of cheese dip/sauce. My little girl enjoyed it so much she won't eat her taco if it's not overflowing with cheese. Here's a photo of the soft taco we assembled last Christmas. We just used the ready mixed seasoning from McCormick when we cooked the beef and chopped a variety of veggies that we like - tomatoes, cucumber, iceberg lettuce, bell peppers.

store bought tortilla bursting at the seams when rolled
i sneaked in some carrots when we cooked the beef filling. sneaky mommy! hehe

Tuesday, November 8, 2011

Recipe: Farfalle with Spanish Sardines and Olive Oil


This recipe is actually an offshoot of a co-worker's recipe. Her's had fried eggplants in it but since my family is not very fond of eggplants (even more of the fried kind) I decided to omit and load on garlic instead which they really love. This was again experimental since it was my first time to try the recipe but I'm glad that it turned out great. I served this when some relatives and friends came over to join us for trick or treating in our village and I'm happy they all went home with happy tummies.

What you will need:

350g Farfalle pasta, cooked per package directions
2 small cans of spanish sardines (deboned and flaked using a fork)
1 head of garlic, finely minced
1 medium white onion, chopped finely
5 medium plump tomatoes, chopped
1/4 cup olive oil
about 10pcs of fresh basil leaves, torn into small pieces
Parmesan cheese
Salt and Pepper for seasoning

How I did it:

1. Saute onion, garlic and tomatoes (I do it in this order usually and I make sure I don't burn any of them) in olive oil.
2. Add spanish sardines and the rest of the olive oil.
3. Season. (I skipped this in my recipe because I usually make sure that the pasta is already seasoned well)**
4. Add basil and toss over cooked pasta.
5. Garnish with parmesan cheese.
6. Serve with a smile.

This recipe can feed 6-8 hungry stomachs. And I think this was the first recipe that I cooked where I spent less than P150 to feed that much people.

**By well-seasoned I meant cooking it in pasta water that taste similar to seawater (I got this tip from a cooking show that Cibo owner Margarita Fores once guested in).

Wednesday, October 12, 2011

Recipe: Crab Aligue Pasta with Lemon and Fresh Basil


On her last visit, my mother-in-law brought us a bottle of Taba ng Talangka. I've long wanted to try making Aligue pasta so it was just perfect timing. Two weeks ago, I was inspired to finally try the recipe but I was already done with our weekly grocery so I made use of whatever was in our pantry and fridge at that time. Most of the recipes I came across in the internet made use of other seafood (tuna, clams, mussels). I was able to whip this recipe in less than 30 mins (prep time including). It turned out to be amazingly easy.

For my version, I used the following ingredients:
  • 200g spaghetti (cooked al dente. don't throw away the pasta water, by the way)
  • about 4-5 tbsps of Crab Paste/Taba ng Talangka (we used Navarro's); some recipes I came across also made use of almost a bottle but I was just too scared of the cholesterol
  • 2 medium-sized tomatoes, chopped (I would have used more but that was all we had)
  • 2 cloves garlic, minced
  • Fresh shrimp (we only have about 8pcs on hand), shelled and deveined (I chopped it so everybody will have a taste of it hehehehe)
  • 1/2 large white onion, chopped
  • juice of half lemon
  • a handful of Fresh Basil, torn in half 
  • 1/2 cup pasta water
  • freshly ground black pepper
  • 3 tablespoons of olive oil
  • Parmesan cheese (since I omitted salt on this recipe)
My version: Aligue Pasta. 
How I did it:

1. Saute garlic, onion and tomatoes in olive oil till translucent.
2. Add crab paste. Saute for about 5 minutes (well I'm just OC on this but I'm sure there's really no need to saute since the crab paste is already cooked anyways).
3. Add the pasta water and simmer for 2-5 minutes.
4. Add the shrimp and wait till pinkish.
5. Toss over cooked pasta.
6. Add fresh basil and squeeze in the lemon.
7. Top with parmesan cheese and you're good to go!

This is good for 4 hungry stomachs (and I was even able to bring in an extra serving for my co-workers to taste). 

Sunday, August 7, 2011

Recipe: Pancit Lomi Soup for the Rainy Day

I initially planned to cook Chicken Mami this morning. But our helper ended up buying thick egg noodles so I decided to try making Pancit Lomi Soup instead. I told my hungry customers not to expect too much since it's my first time and I'm cooking it from memory. Meaning, from how I recall the taste of the best Lomi soup I've ever eaten.


Pancit Lomi Soup for the Rainy Day
(serves 4-6 hungry stomachs)

200 g. thick fresh egg noodles
1/2 kilo chicken soup pack (breast/rib part), boiled and shredded
4 pcs chicken liver, cubed
8 pcs store-bought squid balls, quartered
1 small red onion, minced
3 cloves garlic, minced
1 small sayote, sliced thinly
1 med sized carrots, sliced thinly
1 small head of cabbage, shredded
a few stalks of spring onion

3 cups chicken stock (from the boiled chicken)
2 tbsps cornstarch
2 pcs egg, slightly beaten
2 tbsp olive oil/vegetable oil

Procedure:

1. Saute garlic and onion till translucent. You can slightly brown the garlic if you like the somehow toasted/bitter taste.
2. Add liver and saute till half-cooked.
3. Add the carrots and sayote and stir fry for about 2mins.
4. Add the squid balls, shredded chicken and chicken stock.
5. Dilute cornstarch in a few tsps of water and add to the soup.
6. Add egg noodles (make sure it's cleaned)
7. Add shredded cabbage. Simmer for one or two minutes.
8. Add fresh egg and stir.
9. Season with salt and pepper to taste.
10. Garnish with spring onions.

Best eaten while still piping hot on a cold, rainy day.

Sunday, July 17, 2011

Recipe: Spaghetti with Homemade Tomato Basil Sauce and Ham Bits

This makes a Perfect Sunday Merienda.

As a working mom, I am always on the lookout for easy to prepare recipes. I feel happier if I come across easy to prepare and delicious recipes.

We have a helper at home who is tasked to cook for our little family of 3. But most days, I really prefer to cook our meals by myself. Cooking is a great therapy for me, a respite from all the typing and reading and all-that-boring-stuff-office-people-do kind of thing.

I am a pasta fanatic. Although I have been desperately trying to cut down on carbs recently, I would often choose a pasta meal on my cheat days. A pasta recipe is always easy to whip out. Actually, it was after learning to cook pasta al-dente that I fell in love with cooking. The rest is history, as the cliche goes.

In my side of the family, we've always preferred to prepare homemade tomato sauce for tomato-based dishes. Through the years, we've finally learned how to make the perfectly easy yet tasty homemade tomato sauce. So if you like tomato-based pasta, let me share with you my version which was a recent hit with my co-workers. Their admiration of my home cooking inspired me (and gave me the confidence as well) to share the recipe in this blog.

Fast and Easy Tomato-Basil Sauce

You will need:

1.5 kilos of fresh tomatoes
¼ cup of olive oil
1 medium size red onion (1 large if white)
1 head garlic, minced
1 teaspoon salt
A pinch of pepper
1 small pouch of tomato paste
1 cup fresh basil or
1 teaspoon dried basil
Parmesan cheese (optional)

Procedure:
Simmering Tomato Sauce
  • Wash the ripe tomatoes properly.
  • Make a small cross on the bottom of your tomatoes (this trick is just to make it easy for you to peel off the skin later)
  • Blanch the tomatoes, drain and put in ice bath or run through cold water. Peel the skin off.
  • Chop the tomatoes. Make sure to save the juice as well. You can take out the seeds if you want (but I leave them since seeding takes so much time). Add about a teaspoon of salt and a dash of pepper. Mix then leave overnight in the fridge.
  • Saute chopped red onion in olive oil  until translucent . Add minced garlic. Do not brown the garlic to retain taste. 
  • Add Tomato Paste (I used 2/3 of a small pouch on 1.5kilos of fresh tomatoes)
  • Add the chopped tomatoes (including the juice), stir and simmer for 5-10 mins. (I personally like to have tomatoes chunks on my sauce so I just simmer for 5mins). Add a cup of fresh basil or a teaspoon if you’re using dried.
  • Transfer to blender or food processor and puree. Sauce is good for 1 kilo of cooked pasta (best to use is angel hair/spaghetti pasta). Top with sauteed mushroom-ham and Parmesan cheese. 
This recipe can feed 10 hungry adult stomachs.

To make the mushroom-ham/bacon topping:

You will need:

1 big can of button mushroom (pieces and stem), chopped coarsely
1 med white onion, chopped
4 cloves garlic, minced
1 pack sweet ham/or whatever cold cuts you prefer/bacon bits
1 tsps olive oil or bacon fat if you use bacon instead of cold cuts (if you use bacon, cook it ahead so the fat is rendered)
1 tsp butter

Procedure:


  • Sauté onion and garlic till translucent over olive oil and butter. 
  • Add chopped mushroom and cold cuts/bacon bits.  
  • Top over tossed tomato sauce and spaghetti.

It's super easy and you can store the topping and the sauce separately. You can also opt to store the sauce on a sterilized jar for future use. You can probably store it for a week in the fridge or you can opt to freeze it for longer shelf-life and just thaw it in the microwave if you already intend to use it.
Related Posts Plugin for WordPress, Blogger...